Friday, June 28, 2013

The Curtains That I Didn't Make

Say Whaa?!

I blame Target's Threshold line for being so darn pretty. And when I found that they had a BOGO 1/2 off coupon on the website for curtains, I was off to Target to get me some. I think my daughter's room is starting to become the poster child for that store.


In the store I had thought the trim applique on the panels was more of a chartreuse green, but it turns out that they're more of a goldenrod yellow. I think they play nicely with the tulip design on the bed sheet and also pick up hints of the same golden color in the doll bedding I made earlier this year.

I've also put some storage together for Claire's things. We have a few bins of toys stored under the bed, and I'll be making a custom bed skirt to hide them from view. I've also utilized a suitcase to store her barbie collection. I picked up this vintage piece at the goodwill for $4, and amazingly enough it stores EVERYTHING. There are even a pair of cars in there! I love the pockets on the side-- they're perfect for storing smaller pieces like brushes and accessories.


Originally I bought it to paint and put casters on, but I decided that I really loved as it is. I did need to repair some of the trim on the inside which had a small tear. Nothing a little bit of glue can't fix. When Barbie and Co aren't in play, they tuck easily out of the way under the wardrobe.


I brought Claire's rocker up to her room so she could lovingly care for Poomba while he naps in the crib. The picture on the wall was given to me by my mother. It's an original Hummel piece, and used to grace my nursery wall when I was a baby.


The other side of the room boasts more Target clearance finds, including the unicorn bank that was only $4, and the grey star burst mirror that was $8. My child's movie collection is sickening, isn't it?  I'd love to bring more artwork into the room since there is plenty of empty space still on the wall.


This room is starting to look so much more put together now, and I really love how it's evolved. There are still a few things to do on Bob, though:

Get new lighting
Hang some artwork
Find a rug that fits the space
Book rails for the reading nook
Fill the empty space above the wardrobe somehow
Floating shelves above the doll bed (?)
Sew duvet cover using the tulip sheets
Hang some hooks on the wall behind the door for more storage.

So that's pretty much it for now. I love how this post started about curtains that I didn't make and wound up turning into a mini reveal. I think they really bring everything in the room together, though. I like them a lot more than the green floral ones I had hanging in there previously. What do you think?

Before:


After:


Once I get things cleaned up in the other bedroom, I can unpack my sewing machine and get to work on the duvet cover. I'm keeping an eye out for some pretty artwork inspiration, too. Hopefully I can figure something out for that large space above the headboard.

Anyone else enamored with Target's Threshold line? Are you having as hard of a time resisting their clearance as I am?

Wednesday, June 26, 2013

Claire's Reading Nook

I've been working on this space for a long time. Longer than I would have liked, but sometimes DIY projects just aren't always a priority. C'est la vie.


Nearly a month ago I primed, painted, and caulked the wall and repaired the window. A. Month. Who knew that a space so small could take so long, but then again I kept putting it on the back burner for a while. I had some pretty lofty stencil plans after checking out the amazing $5 sharpie project from Owen's Olivia blog. I took inspiration from this amazing project she had completed in her daughters room. It seemed serendipitous that she used one of my favorite patterns: Ikea's Green Birds print (which they, sadly, no longer make). I loved it so much that I purchased a couple of yards on Ebay a while ago so that I could use it for a future project (Or hoard it in my fabric stash. Same difference, really).

My husband and I purchased a projector a few months ago after we had moved in so we could watch TV in our bedroom without having the eyesore of a big screen television on the wall. We also have been fantasizing about hanging a sheet up and hosting movie nights in the backyard. It also would allow me to make my very own Ikea Green Birds stencil in the closet. In my mind, this project was meant to be.


But it just wasn't turning out as lovely as I had hoped. We had a few years of thick, goopy paint on the wall which didn't exactly leave the smoothest texture, and I was too lazy to skim coat the plaster. I started with a Sharpie fine point, but I had difficulty getting a smooth, even line. The stencil felt really thick and heavy, and I just wasn't happy with it. So I bought some Sharpie ultra fine point pens and gave it a whirl hoping it would turn out better. It did look much cleaner, but it still looked like someone drew on the wall. I'm not sure if the Sharpie markers just did not agree with the type of paint I had used ( Valspar Ultra painter/primer in White), but they did not work very well. I had to keep going over the same lines several times to get them to show up, and I was really disappointed. I gave up in frustration, and went back to the drawing board.

Literally.


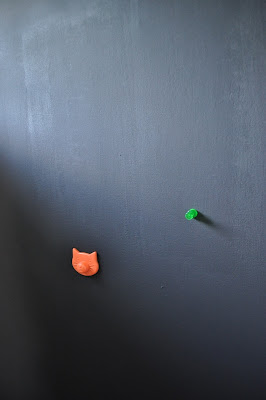
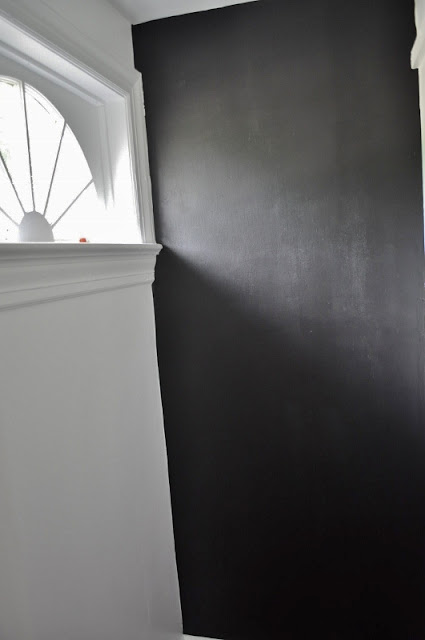
I really loved the contrast of the black and white in the closet. And I thought it would be great to not only make this a reading nook, but a fun little place where she could draw, practice her letters, and color. I also added a little bit of fun versatility with the magnetic primer.


Six coats later, we had good magnetism. The can said to use three thin coats, but after reading some "horror stories" about the disappointment that the magnetic paint had been so a few other bloggers I wanted to make sure my $20 can of metallic primer wasn't a total waste. I asked the gentleman at the Lowes counter to shake both cans for me to ensure the paint was well mixed-- much easier than stirring it by hand. Let me also say that the metallic primer was uber smelly. Apparently it's also oil-based paint, and it made quite the mess. My arms and hands qualified me to join the 102 Dalmatians (Ignore the coke nail that I've got going on in the picture above). But we weren't out of the woods, yet. I still had two coats of chalkboard paint to apply.


We still had good magnetism, but we also had quite the dusty mess. Oy! Once I wiped down the walls and added some seating and books, we now had a fun little space for Claire to enjoy. It wasn't the space I originally envisioned, but it turned out to be perfect.


I love the way this has come together, and I cannot wait to see how it evolves as my little one gets use out of it. The seating I provided is a storage ottoman that I purchased on clearance at Target. Its a perfect place to store her basket of Play-Doh and accessories. I also purchased the pink and orange polka-dot magazine holders at the dollar spot at Target. It holds her coloring books and a few smaller paperback books. The garland is something I made for Claire's 5th birthday party this year, and the CS Lewis box set is from my childhood.


I still have a few things that I would like to add to this closet to make it more functional for her, including a few ledges on the bare wall to the right so we can add more books to the space. I'd also like to make the chalk more accessible, so a tray would be great. Maybe a little table that folds up and down from the wall would be nice, too. As she grows older, I can totally see this transitioning into a space where she will do her homework. We might need to add some lighting at some point for that.

I also want her to be able to make more use of the magnetic part of the board, so I want to make some letters kind of like this for her to use:

Found on pinterest via Etsy shop: CrunchyFarmBaby

I think my favorite part, aside from being able to doodle on the walls with chalk, is the ottoman. Got to love multitasking furnishings! What's your favorite part? Anyone else succumb to the chalkboard craze that has been going on lately?

Monday, June 17, 2013

Pinterest Busters: Microfiber Edition

Hope everyone had a great weekend! Ours was fun and exhausting birthday extravaganza. I can't believe how many people we know with birthdays in the month of June. Crazy!

Ever watch Mythbusters? I'm a big fan of Adam and Jamie, and their fun experiments to either prove or debunk urban legends. Today's post is one of those "I saw that on Pinterest and had to try it" kind of posts. Where I put things that I have pinning to the test. There are so many things that look too good to be true, and you can't believe everything that you pin, right?

Today's challenge is cleaning microfiber. Our love seat used to be a favorite spot for the dogs to sit. I've been trying to be diligent about keeping them off of the furniture, but sometimes they are sneaky and climb up there. Sometimes you just can't teach an old dog new tricks. Both of my dogs have picked this particular chair as the perfect place to groom themselves, and so it was disgustingly speckled with lick spots. And it smelled gross. No judging.


The pictures above show you a side by side comparison of the half that is riddled with dog saliva, and the half that came clean after a good scrubbing with rubbing alcohol and a wash cloth. I have to admit that this is my new favorite way to clean our furniture. Yes, it was rather stinky at first, but the smell does go away, and I am grateful that my love seat doesn't smell like an alcoholic. I've spared you the grossness that consumed my rags when I was finished.

Here's what I used:

1 spray bottle from the dollar store
1 bottle of 70% rubbing alcohol
Wash cloth (or you could use a sponge). Make sure these are either white or the same color as your furniture to avoid possible color transfer from the dyes.

You just spray the cushion and go at it with your sponge or wash cloth. It will appear to be very dark at first, but when it dries, it will lighten. Since alcohol evaporates pretty quickly, it will not leave the water spots that my Bissell machine does. It will also take less than an hour to dry rather than a day or two. You might have to change our your sponge or wash cloth often depending on how dirty your microfiber may be. I went through two wash cloths cleaning this nasty chair.


And Voila! Here is the official "after". I give this Pinterest  legend my stamp of approval. If you've got microfiber, and are looking for an alternative way to keep it clean, be sure to give this method a try if you haven't already. I am pretty darn impressed with how everything came out, and I can't wait to tackle the rest of my furniture. I no longer dread having to clean the upholstery in the living room since it is MUCH faster to both clean and dry.

Any of you have success with certain Pinterest urban legends and care to share your results?


Friday, June 14, 2013

Fruits of the Garden

I'm in garden mode this week, obviously. Bear with me if you're a black thumb, or aren't into that sort of thing. This year I didn't get to build the grandiose raised garden bed of my dreams. I haven't even started building a rain barrel or a compost bin. Each something I wish to accomplish over the summer. Hopefully.

I did manage to pick up a few plants from Aldi of all places. If you aren't familiar with Aldi, it's a great little German-based grocery store. The prices are low because you have to bag your own groceries (bring your own or buy them), shelf stocking is minimal (everything is pretty much set out on pallets), and you put a quarter into your shopping cart to use it which eliminates the need for having to chase down shopping carts throughout the parking lot. Anyway, we love Aldi. It's where we do all of our shopping for groceries aside from the local farmers market.

Here are the plants I managed to pick up from there:


Our $7 sweet pepper plant. We've already used a ton of peppers from this little plant, and there are so many more left. Can you believe that this little guy came with all of these peppers already on it? I had the intention of transplanting it into a bigger pot, but I might wait until we are done harvesting it. I don't want to put it into shock. I love dicing up the peppers and adding it to my egg salad.


The tomato and pepper plants here were each $2 at Aldi. I definitely need to repot these guys. I've already got a little 'mater growing. The smaller plant is lemon balm. He got a little crispy after not being watered one weekend when I was away. I need to put that into a bigger pot, too. Something to do hopefully after this weekend.

My plants have been living happily on the back porch now. I might just keep them there in the container garden. They get plenty of sun here, and brighten it up.


Our blackberry bush has blossoms, and I can't wait for it to produce. It's happy in it's new home on the side of the garage where it gets lots of morning and early afternoon sun. The raspberry bush does not have any blossoms, but it has been growing nicely. I bought the small black trellis from Lowes to help the plants have something to grip to along the base of the garage. It should suffice for the next year or two.

I'm a little disappointed that our garden is relatively small this year, but it gives me plenty of time to properly prepare a space for next year. Hopefully by then our compost pile will be established and ready to transplant some healthy, organic soil into the raised beds. It may be a slow transformation, but we will eventually get there. :)

How about you? Do you have a garden or are you a black thumb?

Wednesday, June 12, 2013

Crimson and Clover

"Now I don't hardly know her. But I think I could love her...."

Nothing like Tommy James and the Shondelles to get us pumped for today's post!

Today I thought I would bring you a post about our garden. It's not the immaculately weeded and expertly cultivated garden of my dreams. You won't find any tomatoes or zucchini here, either. I'm talking about Mother Nature's bounty in an empty field. Some of you might come away from this thinking I am some big hippie. That may be. We love to recycle, and I could wear Birkenstock's (or any brand of flippy floppies) year round. I'm an aspiring amateur herbalist. And I love pretty things-- especially if they are good for me, too.

We are fortunate to have a large, empty field behind our home. It is not part of our property, unfortunately, but the owner has given us free roam of the space as long as we pick up after ourselves. It's a perfect little hill of a field-- great for flying kites or doing cartwheels in the grass. It's also abundant with clover right now.


White clover is such a fun little plant. Bees love it. Horses love it. And I love it, too. It's a wonderful earth medicine that is abundant all summer long. It's crazy good for you, and you might be lucky enough to have this in your yard, too!

Not only does clover fight the common cold, soothe coughs and do away with migraines, but it also promotes healthy hair and fingernails. It has a plethora of detoxing benefits, too.

One of my favorite ways to use clover blossoms is in tea. It is easy to dry and save for the cold winter months, and provides lots of FREE medicinal comfort during the flu season. It is easy to adjust for taste, and boiling the dried petals helps extract the healthy goodness in an efficient way. They have a hint of natural sweetness, and can also add a lovely vanilla undertone when added to any batters or baking mixtures.

Here's how we dry our clover blossoms:

Take a brown paper lunch sack and punch holes in it. Fill it with clover blossoms. I usually only fill only 1/4 of the bag so as to leave breathing room for it to dry. Just give your bag a little shake each day to toss the blossoms around, and they should be fully dry within a week or two (depending on how full you filled your bag). You can use them immediately or you can store the dried clover in an airtight container for when you need them.


Clovers are great fresh or dried-- use whichever method you prefer. I like to dry mine so that they are easier to store for the winter months when fresh clover is not available. White clover tea is great on it's own, or you can concoct your own recipes by mixing it with rosehips, hibiscus, nettle, rosemary, or lemon balm. Feel free to add your own spices, like cinnamon, too.


Some tips for collecting clover:

Be conscious of where you are picking. I usually flick the blossom that I am going to pick first to make sure there aren't any bees hiding where I can't see. You obviously don't want to pick one of those. :)

Be cautious of where you step. If you have a ton of clover in your yard, then you might also have a lot of bee's who are visiting the flowers for their pollen. You don't want to step on any of these, either.

Pick the biggest, fullest blossoms. Our bee friends that I mentioned above are great indicators of which blossoms are best. They visit the ripest, sweetest clovers... so once they are done visiting a flower, feel free to pick it in confidence.

Don't pick every flower in the patch. Leave some for the bees. We are lucky enough to have a very large field which makes it easy to skip from cluster to cluster and collect a large amount of clover.

Clover is abundant year round. Don't feel like you have to spend all day picking everything in sight. More blossoms will pop up again and again. The field behind our house is mowed every so often, too.

Clover blossom picking is a great outdoor activity for the kids! My daughter loves being a part of nature, and it's a great way to show her how to respect it. We watch the bees, and talk about their journey from flower to flower, and eventually to their hive where they make honey.

If you have outdoor pets and are picking blossoms from your yard, be conscious of where they do their business, and not "shop" near there. My dogs have a particular spot in the yard they like to frequent, and so we make sure to stay far away from that spot.

Do not pick and use your clover blossoms if you chemically fertilize your yard or use weed killer. I doubt clover would survive on grass that is sprayed with Roundup, but then again I wouldn't know since we do not use that stuff. The field around our property is mowed every other week, and that is the only "maintenance" it receives.

Image via eattheweeds.com

Have you tried clover blossom tea, or are you willing to try it? Have any other secret herbalist tips to share? I'd love to hear about them!

Monday, June 10, 2013

Sprucing up the Front Porch

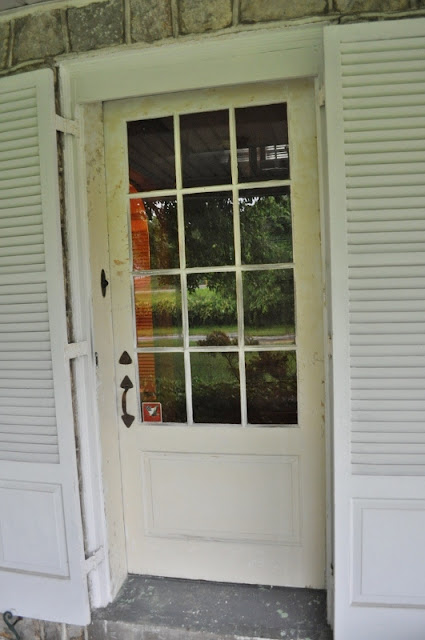
So, this isn't exactly the post I wanted to publish today. I wanted to show you my beautifully painted Adirondack chairs or my front door in it's lovely new coat of paint, but unfortunately the weather hasn't exactly cooperated. It's also turned out to be a much bigger job than I anticipated. Don't you love when that happens?

So here we are. Chairs that are still in primer and a front door that's a hot mess.


I wish it were as easy as slapping some paint on the door and calling it done, however the surface of the door was not in good condition. No telling when the last time the door was painted, but it had several layers of white and cream paint that were cracked and flaking off. So I took my trusty 6-in-One tool from Ace Hardware and began the arduous task of scraping off the paint. It came off surprisingly easy on the lower half of the door. The upper half, however, put up a fight. So I had to bring in the big guns: paint stripper, and soon the upper half of the door as well as the jamb began to look like this:


Paint stripper is nasty, messy stuff. If you've used it before you know exactly what I am talking about. Prep is key. You'll want to make sure you wear long rubber gloves, eye protection, and use plastic sheeting to protect the work space below (something I, regretfully, did not take into consideration). This is what your floors will look like after you scrape the chunks off if you do not prep the floor properly.


Oops. So, it looks like I will have to add "pressure wash" to BOB. Which works out because I had the intention of pressure washing the underside of the porch roof anyway. Speaking of BOB, I don't think I ever laid out my "game plan" for the porch. Here's my list of goals:

Seating
  -Prime and Paint
Paint shutters black
Paint front door and frost the windows for privacy
Powerwash underside of porch roof and concrete
Paint/seal concrete slab
Remove ivy from perimeter of the porch
Remove azalea
Add steps to create a traditional entry for the front porch
Upgrade porch light
Tiered planters with house numbers (something like this or this)
Landscaping
Window boxes for added privacy and color
Maybe beef up the porch columns


So, as you can see, it looks like I have barely scratched the surface of my list. One thing at a time, right?

So, now that it is raining again, here's a sneak peak of what I've been working on inside. It, too, is a tedious process, but perhaps at the end of the week I may have some more to share. :)


How was your weekend? Anyone else get frustrated at how certain projects seem to fly by while others drag at a snails pace?

Wednesday, June 5, 2013

Craigslist Score and Shutter Dillemma

I'm a huge fan of Craigslist. It's usually the first place I stop to shop when I need something for around the house. I love a good bargain, and there are many to be had there. Initially, I was in need of some yard tools-- in particular, an edger. But not the electric or gas powered kind. We wanted the old school rubber wheel with splines. We had priced them at Lowes and Home Depot, but I wasn't interested in shelling out $30 for a plastic tool that had questionable hardware. It just didn't feel very solid. So, naturally, I hit up Sir Craig and his list to see what I could find. Lo and behold, the first listing under my "Trimmer" search revealed exactly what I was looking for: long handled garden tools. Best of all, they were only $5 each! For half of what one tool cost at one of the big box stores, I scored 3 sturdy tools to aid me in my yard work efforts.


And in true dough-brain fashion, I totally forgot to take a picture of the edger-- the tool that started this adventure to begin with. D'oh! The pitch fork is going to come in handy when I finally get a compost bin set up. I've been frantically pinning compost bin styles to my boards, and I like the idea of a 3-bin system. Hopefully I can get started on that project this summer. The pickaxe will hopefully help me loosen up the soil in the flower beds with ivy so I can more easily remove the roots. Some of the root systems on that plant are that of a small tree, and incredibly hard to pull by hand.

The gentleman selling these tools also had a garage full of other great antique finds. Including these awesome shutters that we just HAD to grab. Originally he was asking $80 a pair for these, but I managed to talk him down to $60 a pair. Aren't they awesome!? They're in really nice condition despite their age, and they match the shutters that are hanging alongside our front door.


We have some ideas for these guys: either replace the shorter front porch shutters with these and add a planter box to lengthen the window, make a rustic dressing screen for the bedroom, or a new headboard for our bed. There are so many options! Which do you think sounds like the best project?


These are the shutters that are currently alongside our front door. They are slightly different than the shutters which we purchased, so I am a little hesitant to pair them, but I don't know if that bottom detail is really prominent enough to matter. We will have seating in front of the windows which will somewhat "hide" the bottoms anyway. I'd also like to repaint the shutters (I'm thinking black will be a nice contrast against the masonry), and the door is going to get a dose of color this week.


Here's a good comparison of how short the window shutters are next to the entry door. I had contemplated adding the larger shutters alongside these windows, and then add some window boxes beneath the window to elongate them. Would that look odd or cohesive I'm not sure at this point. The side of our home does not have shutters. I could always relocate the shorter pairs to the side of the house, but would that be necessary? Would it look overdone? Decisions, decisions!

As for the chairs above, they're already undergoing transformation. So far I have them primed and ready for a light sanding before adding color.


I love them already.

What's happening at your home? Have you spruced up your front porch at all? Do you have any suggestions as to our shutter dilemma?